Import & Export Settings
The Import / Export tab in Listora → Settings covers two distinct flows - plugin settings backup / restore as JSON, and bulk listings import / export as CSV. Use it for site clones, version-controlled config rollouts, supplier data feeds, and one-off bulk uploads that would otherwise hit max_execution_time.
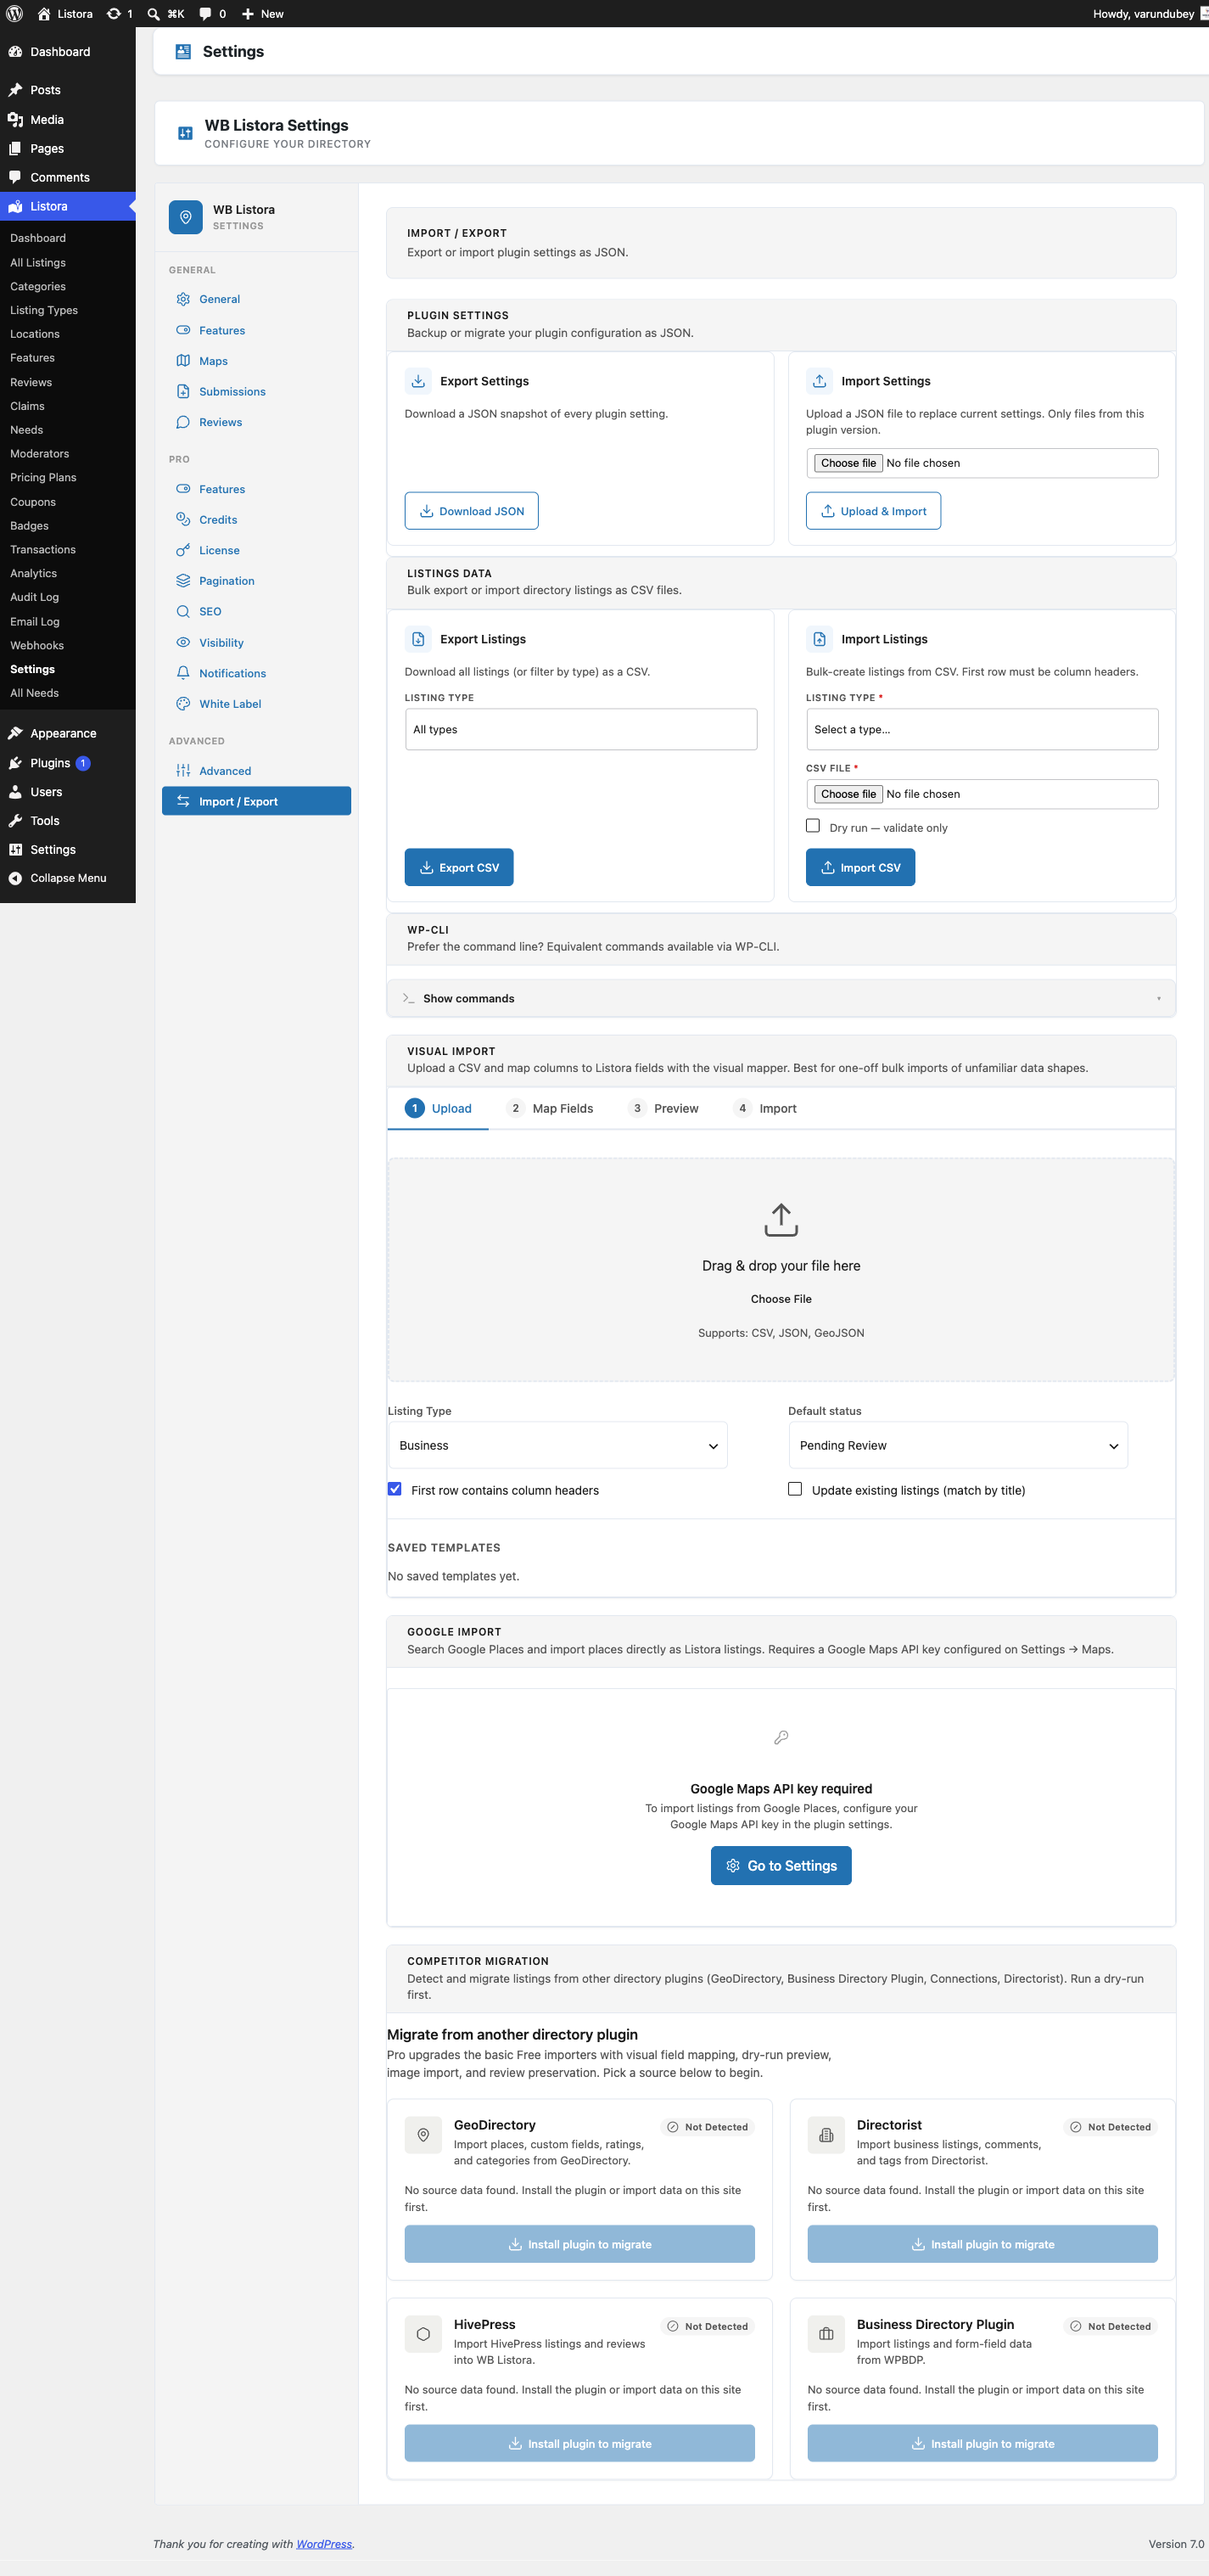
Where it lives
WP Admin → Listora → Settings → Import / Export (?page=listora-settings&tab=import-export)
Requires the manage_listora_settings capability.
Plugin Settings (JSON)
Export Settings
Click Download JSON to get a wb-listora-settings-{date}.json snapshot of every plugin setting - wb_listora_settings, wb_listora_features, wb_listora_pro_features (if Pro is active), and every per-tab nested config. Version number embedded so the importer can warn on mismatch.
Common uses:
- Back up before a major version upgrade.
- Mirror a staging site's config to production after a tuning session.
- Commit to a private repo so config changes are version-controlled.
Import Settings
Pick a previously-exported JSON file, click Upload & Import, and every value in the file overwrites the matching option key in your database. Only files exported from the same plugin version are accepted - version-mismatch import gets rejected with the version it expected.
Caution: import REPLACES, doesn't merge. Settings present on the live site but absent in the JSON get reset to their plugin defaults. Export first if you're not sure.
Listings Data (CSV)
Export Listings
Pick a Listing Type from the dropdown (or All types) and click Export CSV. The exporter streams every published listing of that type into a CSV with the headers Listora's importer expects on the round-trip.
Columns included:
- Core post fields:
ID,post_title,post_content,post_status,post_author,post_date - Built-in meta:
address,lat,lng,phone,email,website,_listora_expiration_date - Every custom field for the chosen listing type (
meta_*) - Taxonomy terms (
listora_listing_cat,listora_listing_location,listora_listing_feature)
Default filename: listora-export-YYYY-MM-DD.csv. WP-CLI lets you target a specific output path with --output=.
Import Listings
- Pick the Listing type the rows belong to (required - every imported row must belong to a single type).
- Pick the CSV file.
- Click Import CSV.
Large files import in the background. Watch the progress bar under the form. To check a file without writing anything, run the import from WP-CLI with --dry-run, shown below.
CSV requirements:
- First row must be column headers.
- Column headers should match field labels OR field slugs - the importer maps columns by name on import. Headers it can't match are skipped.
- One listing per row. Empty cells = field skipped, not "set to empty".
The progress bar shows how many listings are imported so far.
For multi-type imports, run separate imports per type (admin UI) or use wp listora import per file (CLI).
WP-CLI equivalents
The same operations as CLI commands - useful when the file is large enough that the admin UI hits max_execution_time:
# Export every restaurant listing
wp listora export --type=restaurant --output=restaurants.csv

# Export every listing with status=publish (default) as a single CSV
wp listora export --output=full.csv

# Validate a CSV without importing
wp listora import file.csv --type=restaurant --dry-run

# Import for real
wp listora import file.csv --type=restaurant
Full reference: WP-CLI Commands.
Related
- Import & Export - full customer-facing feature doc, including JSON + GeoJSON importers.
- Competitor migration - Directorist / GeoDirectory / WPBDP / ListingPro pull-style imports.
- WP-CLI Commands - every command this tab calls.
- Custom Fields - how field slugs map to CSV column headers.
- Advanced Settings - Rebuild Search Index button to run after a bulk import.