Business Claims
Availability: Free + Pro. The claim workflow is Free; Pro adds the Verification Badge that displays once a claim is approved.
What it does
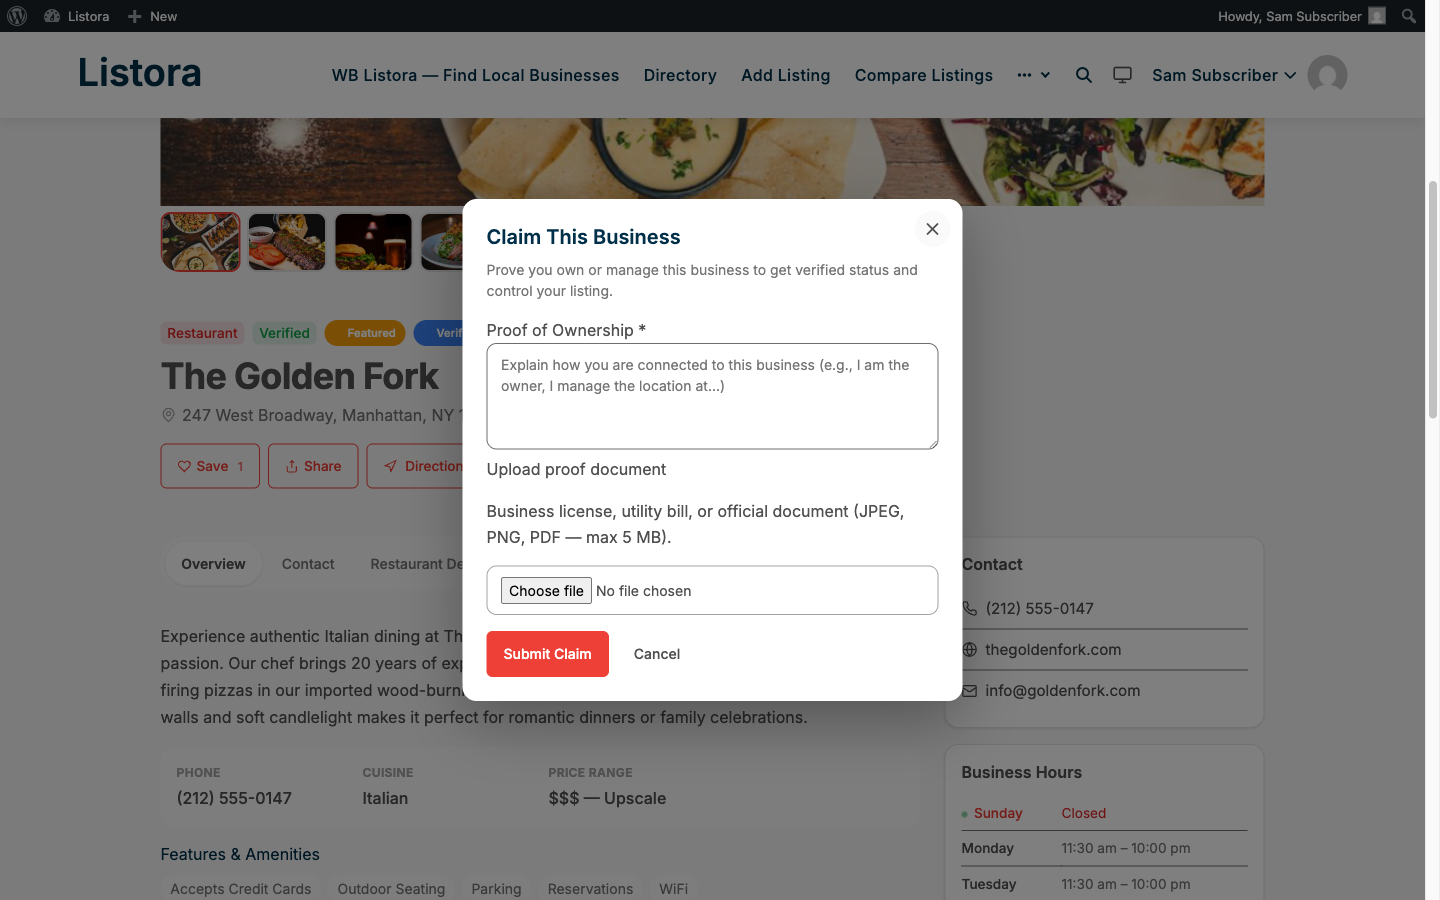
The claims system lets real business owners take ownership of a listing in your directory. Once a claim is approved, the owner can edit the listing, reply to reviews, and manage their services - all from their user dashboard.
Why you'd use it
- Unclaimed listings get stale; claims give owners a reason to keep data accurate.
- Transfers listing management to the owner - reducing your admin workload.
- Creates trust signals: claimed listings can display a verification badge (Pro).
- No code required - the entire flow is handled by the plugin.
How to use it
For site owners (admin steps)
- Go to Listora → Settings → Claims and toggle Enable claims on.
- Set Auto-approve to off (recommended) so you can review each claim before transferring ownership.
- Check Require login to ensure only registered users can submit claims.
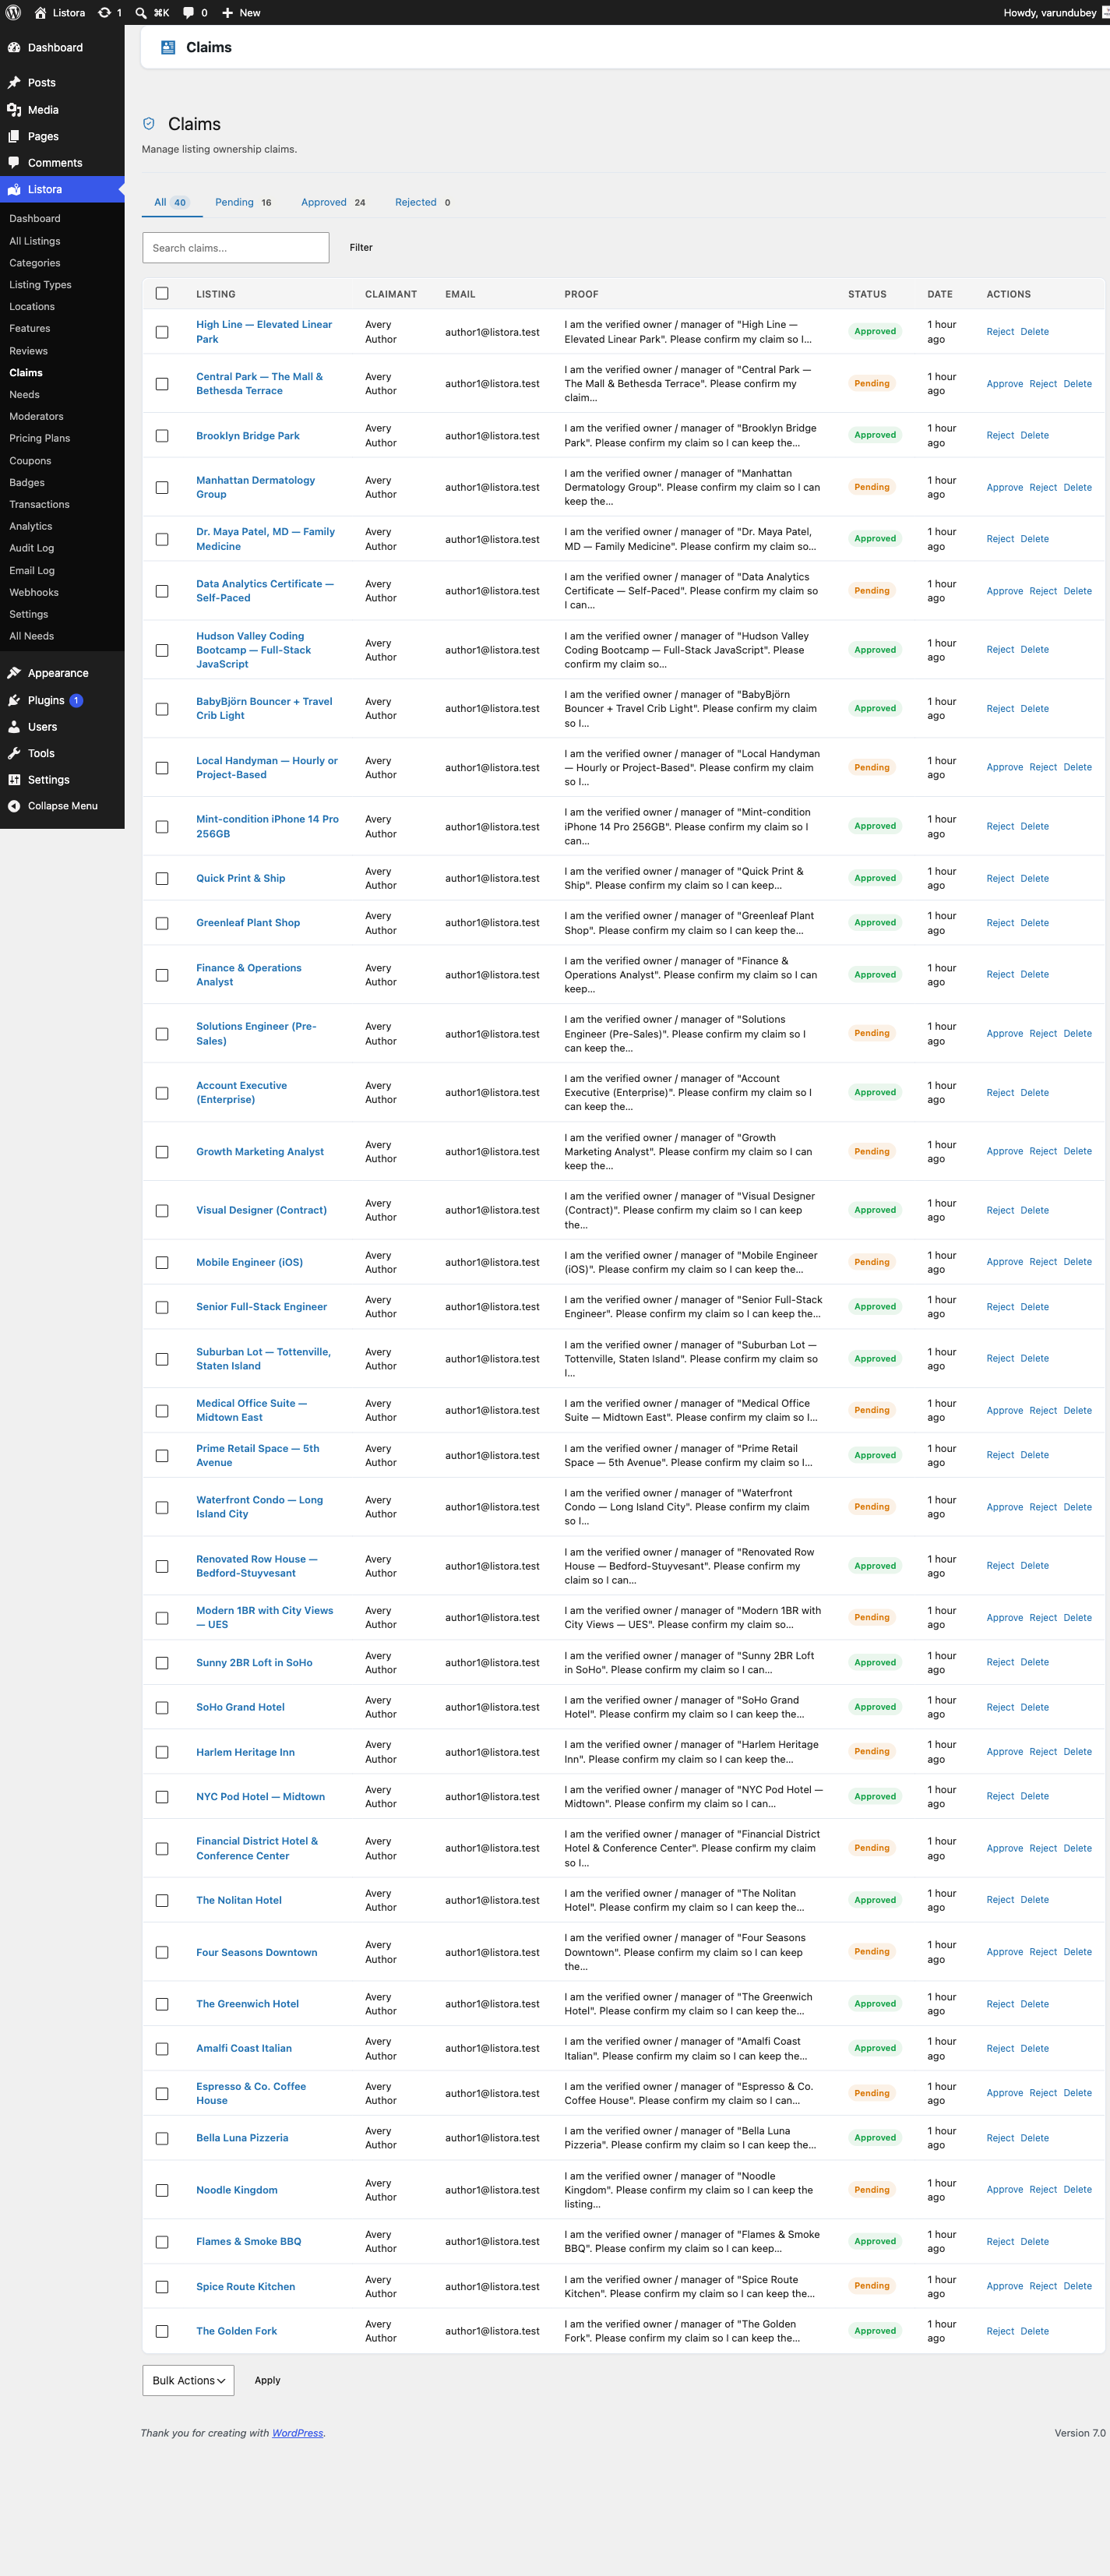
- When a claim is submitted, go to Listora > Moderation > Claims to review it:
- Use All, Pending, Approved and Rejected to filter by status. The list opens on Pending when something is waiting.
- Search by listing, name or email.
- Click Details to see the claimant, their proof of ownership, any documents they uploaded, and their other claims.
- Click Approve to transfer the listing to the claimant, or Reject to turn it down. An approved claim can be undone with Reverse approval in the ... menu, which returns the listing to its previous owner after a confirmation and tells the claimant the claim was rejected.
- Tick several rows and use Bulk actions to approve, reject or delete them together.
- If another moderator already decided a claim, Listora tells you and leaves it as it was.
The list works like the other admin lists. See Admin Menu and Lists.
For end users (visitor/user-facing)
- Find an unclaimed listing (it shows a "Claim this listing" button on the detail page).
- Click the button and fill in the claim form:
- Business role: Owner, Manager, or Authorized Representative.
- Verification notes: How you can prove ownership (e.g., "I am listed on the company registration").
- Contact information: Phone or email for verification follow-up.
- Submit the claim. A success message appears with a "View my claims" link pointing to the My Claims tab on your dashboard.
- You'll receive an email notification when the claim is approved. The email includes an Edit Listing button so you can start managing your listing immediately.
What happens on approval
- The listing's author is changed to the claiming user.
- The user gains edit access to that listing from their My Claims dashboard tab.
- A verification badge can be added manually by the site owner (Pro - see Verification Badges).
- An email confirmation is sent to the claimant with a direct link to edit the listing.
Tips
- Require a phone number in the verification notes field - it makes it easier to contact claimants quickly.
- Reject a claim with a clear reason (e.g., "Please contact support with proof of ownership") so claimants know what to provide.
- Use Listora > Moderation > Claims regularly - pending claims don't expire, so review them on a schedule.
- If you auto-approve claims, be aware that anyone can claim any listing. Only enable auto-approve for directories where listings are pre-verified.
- The My Claims tab on the user dashboard shows claim status in real time. Direct claimants there after submission.
Common issues
| Symptom | Fix |
|---|---|
| "Claim this listing" button not visible | Verify claims are enabled under Listora → Settings → Claims |
| User doesn't receive approval email | Check your WordPress mail configuration; test with a plugin like WP Mail SMTP |
| Approved claim user can't edit the listing | Confirm the listing's author was transferred correctly in Posts → All Posts |
| Claim status not updating on dashboard | Clear your site cache |