Frontend Listing Submission
Availability: Free + Pro. The multi-step wizard, draft-saving, and Duplicate Check are Free. Submitting requires a logged-in account (since 1.3.0). Pro adds the plan picker / credit gating on submit and the auto-attached Verification Badge workflow.
What it does
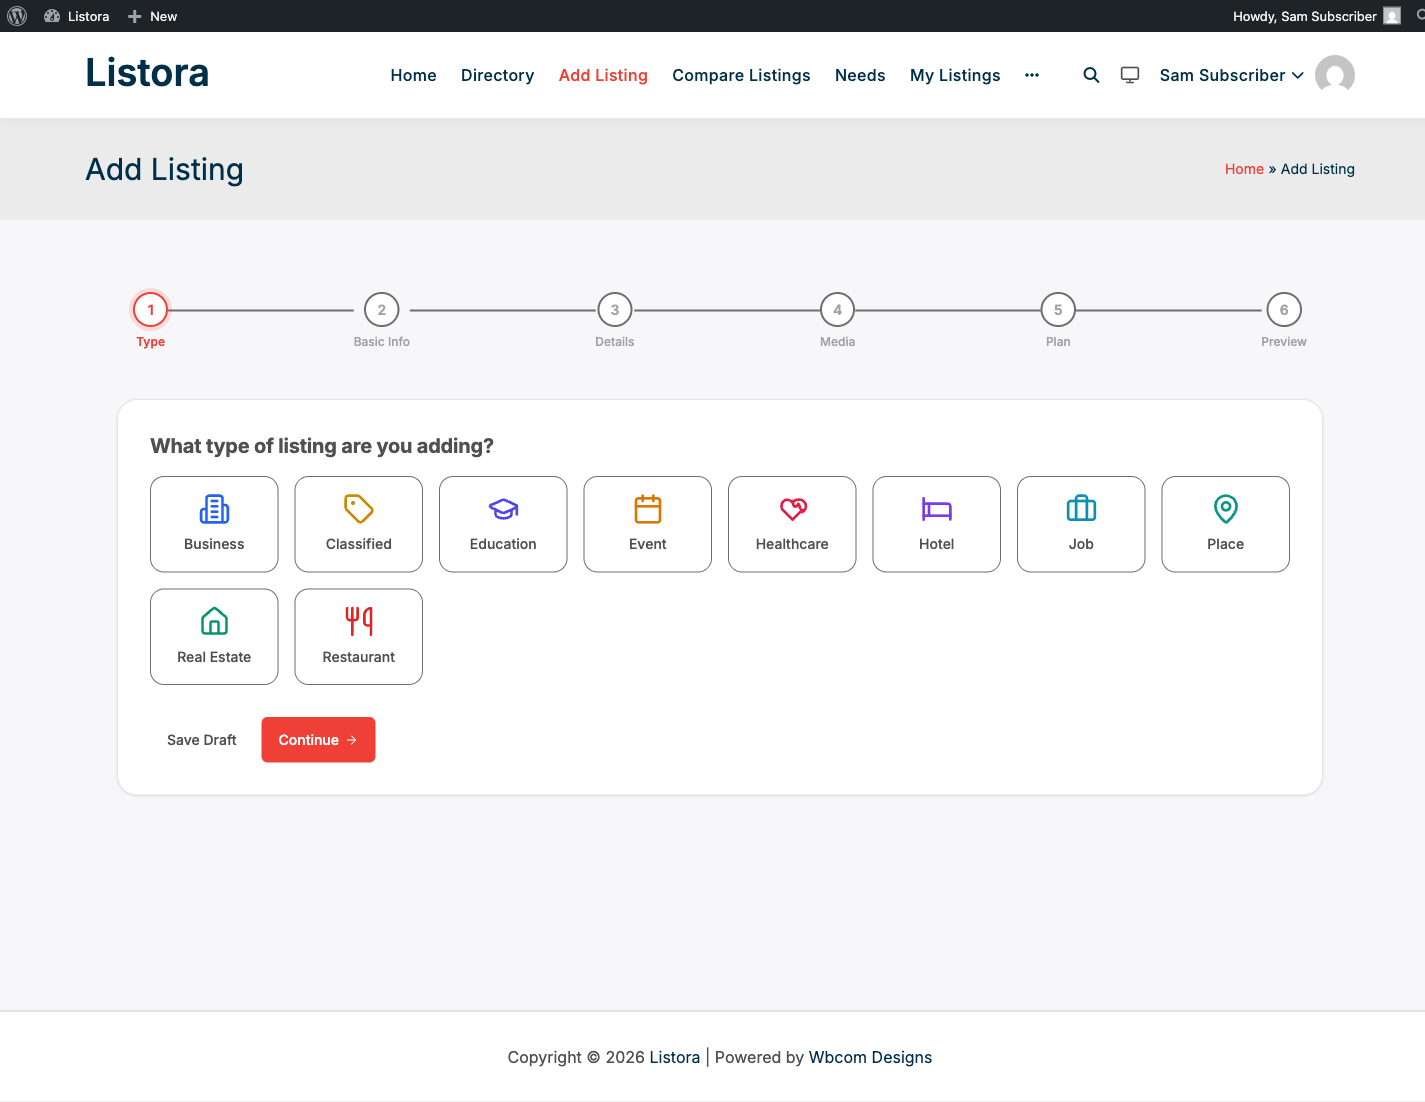
The Listing Submission block gives registered users a multi-step form to add listings directly from your site's frontend. No WordPress admin access is required. Users can also edit existing listings, manage services per listing, and save drafts - all from the same interface.
Why you'd use it
- Directory operators get community-sourced listings without manual data entry.
- Businesses submit their own information, keeping it accurate.
- The draft-reminder email brings back users who started a listing but didn't finish.
- A pre-submit duplicate check prevents identical listings from cluttering your directory.
How to use it
For site owners (admin steps)
- The Setup Wizard creates an Add Listing page automatically with the Listing Submission block already placed.
- To create the page manually: add a new page, insert the Listing Submission block, and publish.
- Configure submission behavior under Listora → Settings → Submissions:
- Submitting requires a logged-in account (since 1.3.0) - visitors who are not signed in see a sign-in prompt with a Create Account link.
- Moderation mode - choose Auto-publish or Manual review (listings held as Pending).
- Edit approval - require re-approval when a listing is edited.
- Allowed types - restrict which listing types accept submissions.
- Image limits - maximum number of gallery images per listing.
- Expiration - days until a listing expires (0 = never).
- Submission form style (since 1.2.0) - choose Step-by-step wizard or Single page form site-wide. The block's Layout Mode attribute overrides this per instance. See Submission Settings for details.
For end users (visitor/user-facing)
Submitting a new listing:
- Go to the Add Listing page and click Start.
- A pre-submit duplicate check runs as you type the listing name. If a matching listing is found, you'll see a warning with a link to the existing listing - preventing accidental duplicates.
- Complete the five steps:
- Choose Type - select the listing type (Restaurant, Hotel, Real Estate, etc.).
- Basic Info - title, description, and featured image.
- Type Fields - fields specific to the chosen type (address, phone, hours, price range, social links, etc.).
- Categories - select relevant categories and feature tags.
- Preview & Submit - review your listing before submitting.
- After submitting, the listing is either published immediately or set to Pending depending on your site's moderation mode.
Tips for filling in the form:
- Type fields: only the fields of the type you chose are shown, so a restaurant never sees hotel fields. Choose the type first. A type that is still a Draft is not offered.
- Tags: type a tag and press Enter or a comma. Each tag becomes a chip. Click the x on a chip to remove it.
- Business Hours: set Monday, then click Copy Monday to all days or Copy Monday to weekdays to fill the rest of the week in one click. Adjust any day afterwards.
- Featured image: upload, or drag a file onto the box. Once there is a photo, Replace and Remove appear under it.
- Gallery: click Add Photos. Each photo has arrows to Move photo earlier or Move photo later, and a remove button.
- Preview & Submit: the last step shows the listing as it will look on a card, then every section you filled in, each with an Edit link back to its step.
- If a required choice is missing, such as a required radio group, the form says which one before it submits.
Editing an existing listing:
- Go to User Dashboard → My Listings.
- Click Edit next to the listing you want to update. Since 1.2.0, the edit form opens inline inside the dashboard (same page, no redirect) when the listing is on the My Listings tab. The full submission block handles the edit, so all the same steps and validation apply.
- Make your changes and save. If the site requires edit approval, the listing returns to Pending until approved.
Adding a new listing from your dashboard (since 1.2.0):
From User Dashboard → My Listings, you can also start a new listing inline - the submission form opens within the dashboard rather than redirecting to the Add Listing page. Both paths (Add Listing page and dashboard inline) use the same form and reach the same outcome.
Managing services on a listing:
From My Listings, click Manage Services to add, edit, or delete services offered by that business. See Services per Listing.
Draft reminder: If a user starts a listing and doesn't submit within 24 hours, Listora sends an email reminder with a link to resume. This is handled automatically - no configuration required.
Tips
- Set Moderation mode to Manual review for public directories. This prevents spam and low-quality listings from going live automatically.
- Use Allowed types to restrict submissions to specific types. For example, a restaurant directory should only allow the Restaurant type.
- Conditional fields: some field types only appear based on earlier answers (e.g., a "Cuisines" field only appears after selecting the Restaurant type).
- The draggable map pin on the address field lets submitters fine-tune their precise location on the map.
Common issues
| Symptom | Fix |
|---|---|
| Submission form is blank | Confirm the Listing Submission block is on the page, not a shortcode |
| Users can't see the form | Confirm the user is logged in - submission requires an account |
| Submitted listing not visible | If moderation is on, approve the listing under Listora → All Listings |
| Draft reminder not sending | Verify WordPress cron is running - check with a plugin like WP Crontrol |
| Images not uploading | Check your server's upload_max_filesize and post_max_size PHP settings |