Verification Badges
Pro feature. Available in Listora Pro.
Availability: Pro only. Requires Listora Pro. Free sites can approve claims but cannot award verification badges.
This page covers two things that work together. The Verified badge marks a listing you have vetted. Badges are small labels such as "Top rated" or "New" that Listora gives to listings by a rule, by plan or by hand. Jump to Badges for the second.
What it does
Verification badges let you mark individual listings as verified businesses. A badge appears on the listing card in search results and on the listing detail page. Visitors see at a glance that this business has been vetted by the directory.
Why you'd use it
- Verified badges build trust with visitors making decisions about which business to contact.
- Listings with badges stand out in the search grid, increasing click-through.
- Awarding badges gives business owners an incentive to keep their listing information accurate.
- You control which listings earn a badge - verification is always a manual, admin decision.
How to use it
For site owners (admin steps)
Verification badges are managed from the WordPress admin listing edit screen.
Awarding a verification badge:
- Go to Listora → Listings and open the listing you want to verify.
- In the right sidebar, find the Verification box.
- Check Verified Business to award the badge.
- Click Update to save.
The box also shows the listing's Claim status (Claimed or Not claimed). That is read-only. Claims are approved from Listora → Moderation → Claims.
The badge appears immediately on the listing card and detail page.
Removing a badge:
- Open the listing in the admin.
- Uncheck Verified Business in the Verification metabox.
- Click Update.
Search filter: Visitors can filter search results to show only verified listings. The verified_only=true parameter is supported in the search REST API.
For end users (visitor/user-facing)
Verification is managed entirely by the site owner - there is no self-service verification flow. Visitors see the badge on:
- Listing cards in the search grid.
- Listing detail pages near the listing title.
Badges (labels on listing cards)
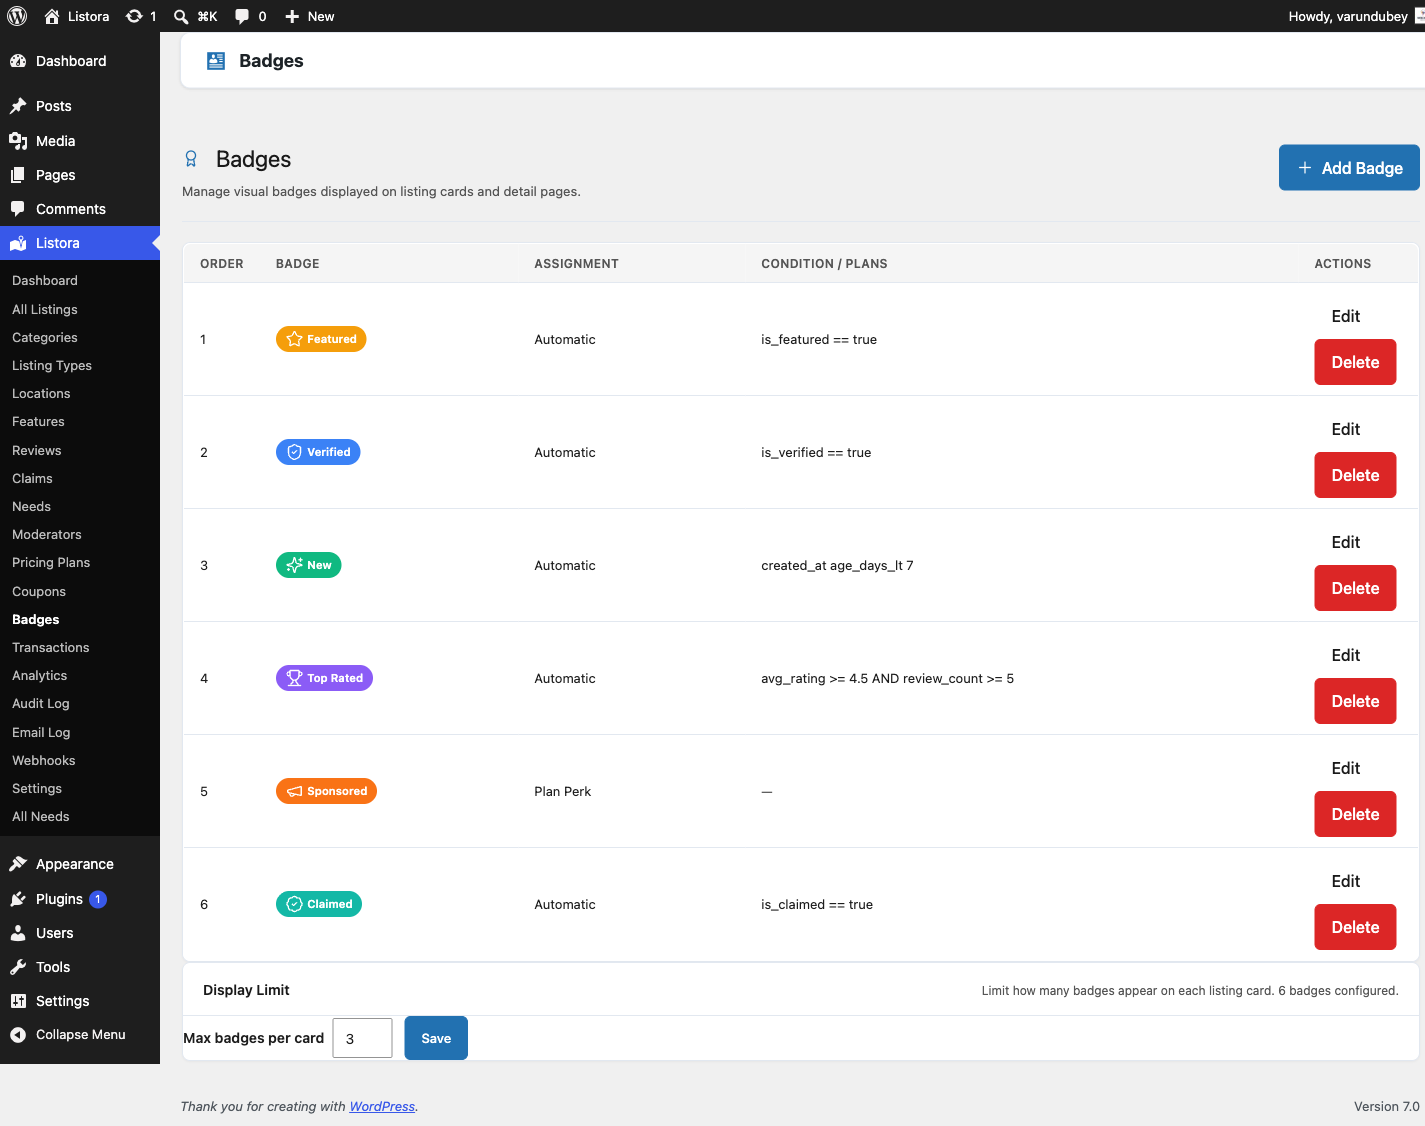
Badges are small coloured labels on listing cards and listing pages. Use them for things like Top rated, New, Featured partner or Hotel. A badge can be given three ways:
- Listings that match a rule, automatically - for example every listing rated 4.5 or higher.
- Listings on chosen plans - every listing on the plans you tick.
- Listings I give it to by hand - you tick it on the listing's edit screen.
Managing badges
Go to Listora → Listing Types → Badges. The list shows each badge as it looks on a card, Who gets it in plain words, and Listings with it.
- Who gets it reads like a sentence. A rule badge shows "Automatically: Rated 4.5 or higher and 10 or more reviews". A plan badge shows "Listings on Premium, Featured". A manual badge shows "Listings you give it to, on the listing edit screen".
- Listings with it is how many published listings hold the badge right now. It shows a dash when a rule uses something Listora does not keep in its search index, because that count is worked out per listing when it is shown.
Putting badges in order
Badges show in list order when a listing has more than one. Drag a row to move it, or use Move up and Move down in the row's actions. The new order is saved right away and the page reloads.
Badges per listing card
Under the list, Badges per listing card has a Show up to field. A card shows at most that many badges, in list order, from 1 to 10. The default is 3. The listing page always shows all of them.
Creating a badge
- Click Add Badge.
- Fill in:
- Label - the text on the badge, such as
Top rated. - Icon - the name of any icon from the Lucide set, such as
star,trophyorshield-check. - Colours - a Background and a Text colour. If the text would be hard to read on the background, Listora darkens or lightens it. The Preview updates as you change these.
- Who gets it - choose how the badge is given (see the three ways above).
- Label - the text on the badge, such as
- For a rule badge, build the rule under The rule. A listing gets the badge when every line is true.
- Click Add a line, pick What to check, How to compare and a value.
- Reads as: shows the whole rule in plain English as you build it, so you can check it says what you mean.
- Click the remove icon on a line to delete it.
- For a plan badge, tick the plans under Plans that include it. Plans are created under Listora → Monetization → Pricing Plans.
- Click Save badge. Listings show the change right away.
What a rule can check
| What to check | How to compare | Value |
|---|---|---|
| Average rating | is at least, is more than, is at most, is less than, is, is not | a number |
| Number of reviews | is at least, is more than, is at most, is less than, is, is not | a number |
| Added in the last… | (a number of days) | days |
| Featured | is, is not | yes or no |
| Verified | is, is not | yes or no |
| claimed by its owner | is, is not | yes or no |
| Listing type | is, is not | a listing type |
For example, "rated 4.5 or higher and 10 or more reviews" is two lines: Average rating is at least 4.5, and Number of reviews is at least 10.
Giving a badge by hand
Open the listing in the admin. In the Badges box in the sidebar, tick the manual badges you want. The box also lists the badges the listing already has from rules and plans.
Deleting a badge
Use Delete in the row. Listings showing the badge lose it straight away.
Badges tips
- Put the badge you most want seen at the top of the list, since a card shows only the first few.
- Add a Verified line to a rule if you want a badge that follows the Verified Business checkbox.
Good to know
Badge pill icons are rendered on the server. They used to be drawn in the browser by a script that did not run on the front end, so a correctly configured badge showed its label with a blank space where the icon belonged. If you configured badges before 1.6.0 and gave up on the icons, they work now with no change on your side.
Tips
- Establish a verification policy before awarding badges. For example: "We verify businesses that have been claimed and have a physical address confirmed by the owner."
- Verify listings after a claim is approved: approve the claim, then open that listing and tick Verified Business in the same session.
- Verified and claimed are separate. A listing can be claimed without being verified, and verified without being claimed. Only verification is set here. Claiming is managed through the claims workflow.
- To filter search results to verified listings only via URL, append
?verified_only=1to your directory page URL (requires the search block to respect this parameter). - To see how many listings are verified, create a badge with the rule Verified is yes and read its Listings with it count.
Common issues
| Symptom | Fix |
|---|---|
| Verification box not visible | Confirm Listora Pro is active and the Verification System feature is on in Listora → Settings → Features |
| Badge not appearing on listing card | Clear your site and page cache after saving. Check the card is not already showing its limit under Badges per listing card. |
| Badges screen missing | Confirm Custom Badges is on in Listora → Settings → Features |
| "Verified only" search filter not working | Confirm the verified_only parameter is supported in your version - check the REST API docs |